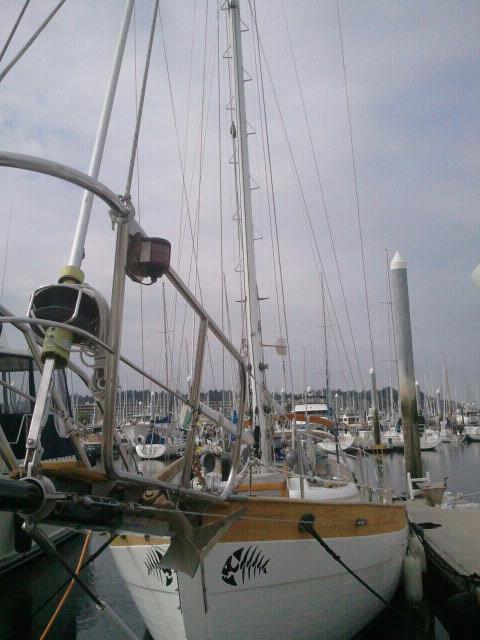
Don’t you just hate when your friends are right.

A couple years ago, a friend of mine (Aaron on Bella Star) was giving me some bullshit sob story of how hard(expensive) it was for him to find a replacement fresh water coolant pump for his Yanmar engine.

As he was telling me his story, I remember thinking, “What is this dickhead going on about”? I just went down to Hatton and got a brand new mixing elbow for my Yanmar (3QM30Y) engine. And had no problems getting parts at all. I was also thinking about a sandwich I had eaten the day before…..so delicious, so god damn delicious! So I may or may not have heard how he ended up getting his replaced.

Fast forward to this Labor day weekend. I had just started the engine on my boat, and was untying the dock lines to take off for the weekend. Just as I was about to put it reverse, the engine starts running a little rough and vibrating oddly. I retied the lines and checked the engine compartment.

Smoke!

SHIT!

I shut everything down and started troubleshooting. I noticed the fresh water pump was not spinning and was burning up the alternator belt. My first thought was that this would be an easy fix. Just pull off the old pump, go buy a new pump and bolt it back on. Easy Cheesy, right??

Nope, turns out Aaron was right. Yanmar has discontinued making water pumps for that engine. You can still get the parts to rebuild them, but not the pump housing. And hey, guess what! My pump housing was fucked up!! So I get the old, “you can always check craigslist or ebay”

If Yanmar still made this pump, the price for a replacement is around $800! I dug around the internet but could not find anything for sale that I could use.

What I did dig up is a website: www.rebuilt-water-pumps.com

It’s a small company down in Oregon. All they do is rebuild water pumps. So I call them up on a Thursday and describe my problem. The guy on the phone says: “Send me your pump, I’ll have it fixed and back to you by next Friday”. I was happy as shit, but was afraid to ask the price for that kind of service. He said it would probably be around $95 dollars. Maybe as high as $125 if the housing was really messed up.

True to his word, he calls me the following Wednesday and says the pump is ready and already in the mail back to me. Please send him a check for $135. The extra ten dollars is to cover the cost of shipping.

Oh and he includes a 3 year warranty on his rebuilds! WHAT!?
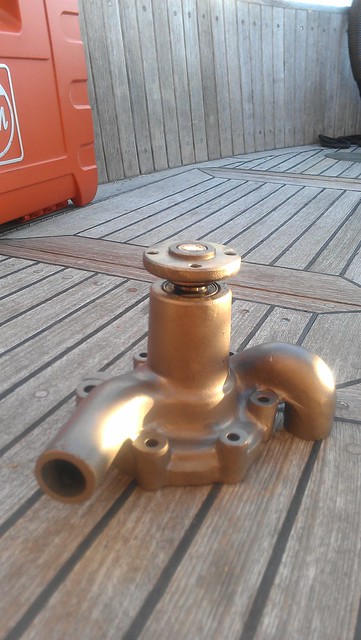
I got pump back, and it looks as good as new. He even included a gasket and two tootsie pops. I ate those, before I took the picture, sorry. They were watermelon flavor.

Posted in Installations | 4 Comments

Don’t sweat the petty things….

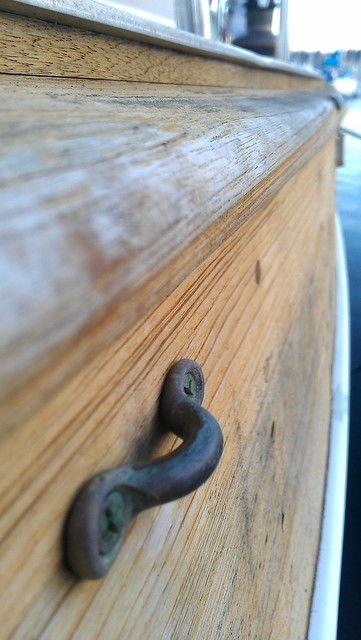
When we first got our boat 6.5 years ago, one of the very first “projects” I did was to install six little brass pad eyes. Three on each side of the boat, on the outside of the gunwales. We use them for clipping our fenders to. Each one is screwed in with two 1 inch brass screws.

I bring up this stupid little fact to point out that I used to STRESS the fuck out about those six little brass pad eyes. For some reason I had it in my head that water would seep in, rot the boat to the core, then catch fire and those flames only extinguished when the boat finally sank to the bottom.

This little bastard and his brothers used to freak me out.

Back in June we pulled the mast, replaced just about every thing that even remotely touched the it. This list includes, but not limited to the standing rigging, running rigging, lights, nav. equipment. compression post,…….the list goes on.

Last weekend we took the boat out for the first sail since we did all that work. And I would like to emphasize, that WE (Me and Tawn) did 90% of the work ourselves. Every bolt, screw, cotter key, you name it. We did it, undid it, redid it, painted it or rewired it.

So to say the pucker factor was a little high when we started putting up sails for the first time is not an exaggeration at all. But honestly, and I am not kidding about this. I worried more about those six little pad eyes I screwed into the sides of the boat way back when, then I did about any part of this mast project.

Other than a little weather helm on a starboard tack (a rig tune will take care of that), everything worked as it should.

Here we GOOOO!!!

Posted in Installations | 3 Comments

Kiss my ass Rivets

Ever tried to remove a rivet? It is freaking maddening. I would usually just end up choosing the nuclear option and trash what ever it was I was working on to get the little bastard out.

One of the many ToDo items on my recent mast project was to remove and replace a crapload of rivets on my mast and was not really looking forward it. Until I found an awesome little tool that makes it freaking simple as hell.

This is that tool:

It’s called a Rivet Removal Tool which is a pretty ingenious name when you think about it. It’s a tool, that removes rivets. Seriously, how do they come up with this stuff?

I guess it is kind of expensive (approx. $60), but I’m a sucker for single use tools. Tools that are designed to do one job and do it AWESOME!

Once I started using the thing, I ended up replacing more rivets than originally planned. It basically works like a drill bit, but has an extra part that grabs the rivet head and keeps it from spinning. And that is the part that drives you fuggin crazy if you don’t have this tool.

Now I can save my nukes for other things that I swore I would NEVER take off again and used 5200 on.

Posted in Installations, Palarran, tools | Leave a comment

We are no longer a power boat!

There is nothing natural about the photo below.
No mast

Like most boat projects, this one took longer and cost more than we had originally planned. We thought we’d have the mast off the boat, everything done and mast back on in about 2 weeks……………………

Everyone done laughing now? Lets continue.

It was actually 6 weeks. Although to be fair, we didn’t do anything project related over the 4th of July weekend.

The biggest time sink was not actually the work on the mast.  We had a few projects that would much easier to do with the mast down and compression post out of the way. But once the mast was down, and we started digging around (our first mistake), we discovered a few other issues that required attention. Classic scope creep!

I put up a post a couple weeks ago that outlined some of the new stuff we added to the mast. And in addition to all that we also replaced ALL of our standing rigging. This was not planned, but we are glad we did it. In the process of getting quotes for new rigging, we found out a little secret that apparently not a lot of people know about. Fisheries Supply does rigging. Does it very well, and quite abit cheaper than some of our more “famous” riggers in the area. Fisheries does not come out to your boat, so I imagine that is where a lot of the savings are. But if you are willing to do the heavy lifting, pull your rigging and bring it to them, they will do the work and give you back some very nice/shiny new boat jewelry for you to re-install on your boat. And the price difference was a jaw dropper. Having an account at Fisheries Supply helps alot here as well.

With the mast down, we pulled and inspected the chain plates, which is only proper. They were fine, but there was a small bit of rot in the decks near the areas where they go through the decks. This was one of the unexpected bits. But, Tawn took care of that. Some of the chain plate bolts need replacing. The actual replacing of the bolts is easy. Finding exact replacements for bolts that were installed in Taiwan in the early ’80s, is neither easy, or cheap.

We also remounted our windlass (Lofrans Tigres). The previous owner had it installed in a manner that created a persistent leak when it rained. We tried every trick in the book, but could never figure out how to stop the leak completely. So while the mast was down, we redid the mounting and plugged the old holes. So far, so good.

The biggest and to me scariest bit, was removing the compression post. We did this for two reasons. One was we wanted to remove an old, leaking 20 gallon fresh water tank. That tank lived just forward of the compression post. Without removing the compression post, the only way to get it out was to cut it out. Which I almost decided to do. This brings us to the second reason for pulling the compression post. The compression post had about a foot of fresh water standing in it. The water got there from running down the wires coming down from the mast. There is no good/easy way to completely prevent this water from traveling down the wires and into the compression post. But typically, there should be a small hole or two drilled at the bottom of the post to allow the water to drain out on it’s own….on our boat, there was not.

With the post out, we drained the water and tested the post for soundness and drilled a drain hole and put the post back in place. I type this up in a quick paragraph or two, but honestly it was a lot of hot, dirty, itchy work that we could not have done with out the help of a couple very knowledgeable and helpful friends. You have no idea how grateful I am to my friend Ethan for his help with the fiberglass.

I know I should take pictures of all this as I’m doing it. But to be honest, it never occurs to me to take a picture while I’m actually doing the work.

Tawn took a picture the day after we re-stepped the mast. It’s the best I could do. :)

With mast

And I promise, that picture was taken yesterday, not months ago.


Posted in Installations, Palarran | Leave a comment