This is an older post that was written in 12/12…
When we first bought the boat…I didn’t want to think about the bilge. It was dark, deep and dirty and clearly something that did not need my immediate attention. As the years went by, certain things in the bilge area needed fixin’…like leaky fresh water hoses, pumps (the main bilge pump in particular as it kept going off) and eventually leaky water tanks.
The first thing was to fix a constant leak that made the bilge go off several times per day. This was accomplished last year after ascertaining that it was in fact coming from a leaking collar around the rudder shaft (which meant seawater). So last Labor Day we hauled out and CB spent the better of 4 days shoving himself into a very tiny access door in the aft cabin while I painted the bottom. After removing what seemed like half of the boat, he gained access to the impossible to reach (and work on) steering column. We took this opportunity to clean and repaint the steering quadrant as well…which was still in pretty good shape. The old shaft boot was worn and leaking allowing water to seep into the fiberglass tube that came up from the hull to house the shaft. We cut off the damaged part and re-fiber glassed the housing. The previous boot had been half-assedly fixed by applying copious amounts of black goop around the flexi-hose….which added another complicated aspect in removal. After all the old stuff was removed, fixed and cleaned…we were able to repack the shaft and put on a new boot and put it all back together again. Also, during this process, we took off the prop and took it in to be polished and have a chip fixed. When we got the boat back in the water, we had a small moment of panic thinking the engine had died as the vibration that always indicate power, was gone…amazing what a tiny chip in your prop can do.
Next issue was replacing the old water pump with a constant pressure pump which used less amps. That was the easy part…the hard part came back to the bilge…the inaccessible, cold, ugly dark bilge. All of our fresh water lines were probably original and had clogged with plaque like old arteries. When you powered up the constant pressure pump, it was like a sprinkler system went off under the floor boards. So for an entire weekend I pulled out old hoses replacing them with shiny new flexible ones. Unfortunately I could not locate a boat midget that surely put all the hoses in to begin with and spent a lot of time on my stomach with one arm on one side of a floor board while the other frantically grabbed from the other side searching for that hose to pull through. Anywho, my arms have finally healed from all the scratches, cuts and lord knows what type of flesh eating diseases I picked up from the bilge and we have a proper functioning fresh water system.
Then came the leaking water tank. When we bought the boat, the forward water tank was leaking, so we took it out of commission. We relied on our main 40 gallon tank and the aft 30 gallon tank was as back up. Well, one day…the main water tank started leaking. It was slow, but definitely needed fixing. I purchased some Microseal that was supposed to seal up to 1/8″ cracks and was food grade so it could be used inside stainless water tanks. I prepped the inside of the tank…which was actually pretty clean….sprayed and waited the allotted 2 days. I then filled the tank and….still leaking…sigh. This led to the next step of removing the tank. I was sure that we would have to tear out some flooring, but with smoke and mirrors CB hoisted that bad boy out and wallah…about a 1/4″ hole in the bottom from one tiny aluminum screw that had corroded the bottom of the tank. That screw was living in what only could be described as compost. By poor design, Hans Christians have weird recesses in the bilge area that collect debris. Ours was filled with 28 years of sawdust, lost parts, pieces, an old beer can from 1965 (which is weird because the boat is an 83″) and an alarming number of cat toys???
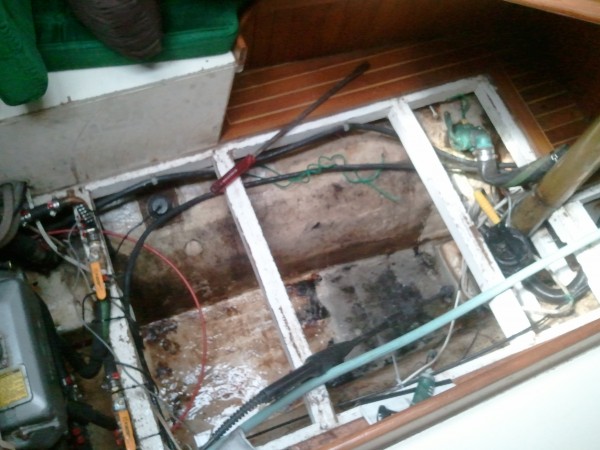
This is the after photo once the compost was removed and excrement hosed out. The before photo was just too embarrassing.
The next step was to clean, power wash and paint this area while the tank was out being welded by a friend. Lots of gross cleaning and 2 coats of Interlux Bilge Coat later, the bilge is sparkly clean.
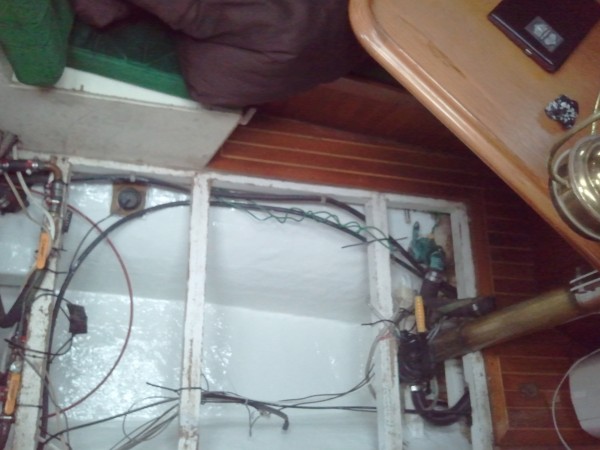
Pertty white bilge! You could eat out of this thing….well…sorta.
Just down the road from that project was the re-rig, rewire, re-everything project from hell which was briefly touched on in another post. During that, we wisely??? decided to pull the compression post to test it’s soundness. Once the post was out, we removed the old leaking forward tank that could only have been removed when the compression post was out or by dynamite (we opted for the first…although there have been many moments of reconsideration since). Guess what…more compost…bleeechhh. So I again cleaned prepped and painted and we now have a beautiful water migrating bilge. We are not putting a tank back forward and will build some extra storage up there. Soon the big water tank will go back in and we will be water rich again.
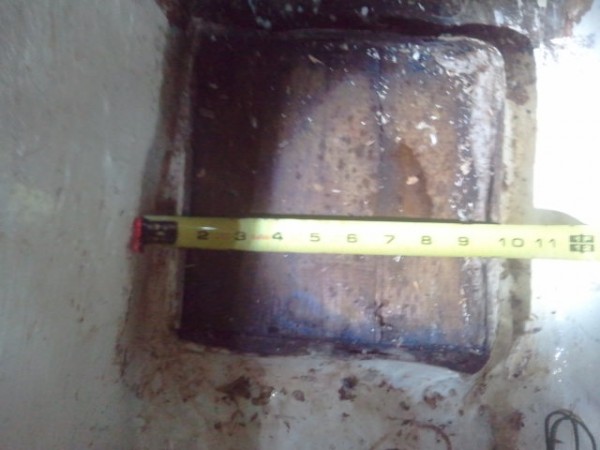
This is the pad for the compression post that had absorbed nasty water over 28 years. It was cut out and a new composite one was placed in. The compression post sits on top of this and is fiber-glassed into place. We later drilled a hole into the bottom of the post so the water from the mast would not build up.
The moral of this probably too long post…is out of sight should never be out of mind and cleanliness IS next to godliness. A clean bilge allows for problems to be spotted early. Using a vacuum to clean up after projects involving sawdust and floating wooden bits can be a pain, but in the long run will save you a BIG mess down the line. And fishing after those lost metal pieces is of utmost importance, the bilge is no place for random metals to be co-mingling.

