V-Berth project

Originally our V-berth had shelves running along each side. One on the starboard side and two on the port side. As far as storing things went, they sucked. Nothing stayed put under sail. A small bit of heel and just about everything would end up off the shelf on on the bunk. All you could really do was stack things up and then re-stack them after each sail. And, there was a foot of wasted space to the ceiling of the v-berth.

A couple years ago my buddy Dawn Rodney on Deep Playa turned her shelves into cabinets and I’ve wanted to do the same ever since I saw how awesome her’s turned out.

As per usual I did not take any before pictures of the v-berth or any of the process of making the new sides and dividers for the cabinets. I did manage to take a few during pictures of the cabinet doors while I was making them. Not many, and not until I was almost finished and to the varnishing stage, but here they are none the less.

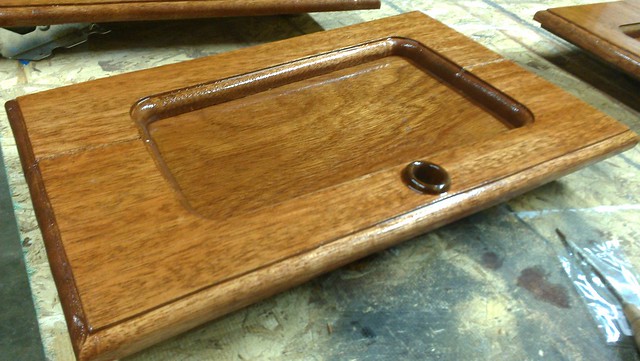
I was just gonna buy the doors, but Fisheries Supply only had two options. One was too small and the other to large. Neither had the right shape. And they were way more expensive that I wanted to pay. So, to the workshop I went.

This first picture was taken after all the cutting/sanding/routing and gluing was done:
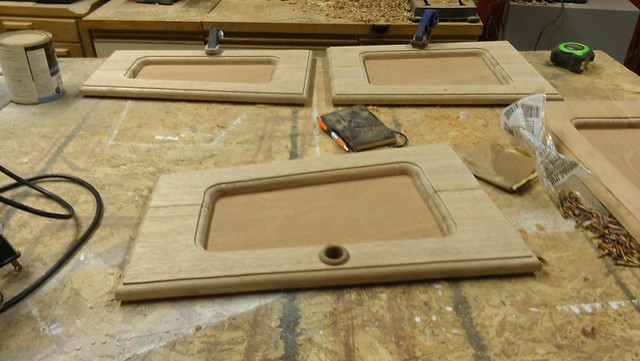
Doors

And these next two are them after a couple coats of stain and varnish:
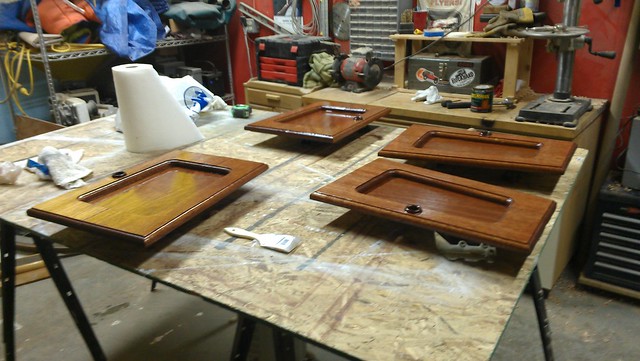
Four doors

Closeup

I think the project turned out pretty good. And Tawn did an awesome job matching the stain color to the existing wood.
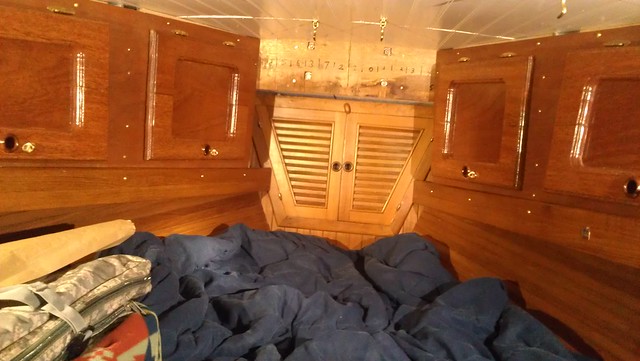
Bed is not made, never is.

I still need to stain and put in a few pieces of trim. As well as a finish piece at the very foot of the v-berth, above the louvered doors. I think I’m going to find a really nice piece of wood and have something, not sure what, carved into it.

This last one is a close up (out of focus too) of the hooks I installed to hold the doors open.
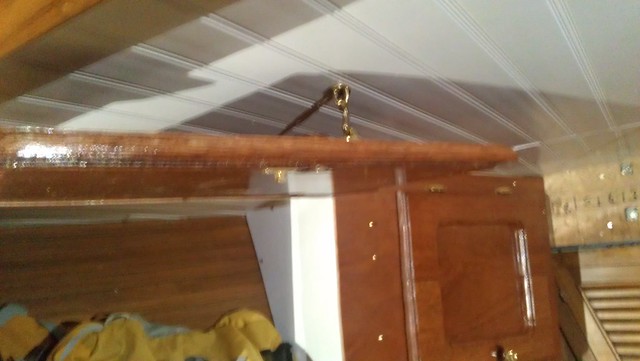
Door action shot.

As with most of my projects, there are flubs and major imperfections. But I’m ok with that.

Posted in Installations, Palarran | 5 Comments

I suck at sewing.

Not sewing in general, but making the stitches go in a straight line. I need to get better, we have a few sewing projects we wanna do on Palarran. Plus, I REALLY, REALLY, REALLY want to make a pair of shorts out of our old sails. And before anyone says it, I am fully aware of just how uncomfortable those will be. But I don’t care how sweaty or chaffed mah balls get. I WILL make and wear those shorts dammit.

But, I digress.

In order to help me get better at sewing, I made a thing. Which is not really all that odd, I make a lot of things. There are a number of reasons I make a thing. One, the thing I need is for my boat and nobody else makes that particular thing. Two, I need a thing for my boat that someone makes but it looks easy enough to make and I’m sure I can make it for much cheaper than I can buy it…..Sometimes. Three, I think I can make something awesome and not afraid to waste time and money on doing trying it. Just ask Tawn or some of my asshole friends/shop mates about “The Robot”.

The particular thing I made this time is called a “Magnetic Sewing Guide” and can be bought from, among other places, Sailrite.com: Magnetic Sewing Guide It only cost around $30 bucks plus shipping. It looked like a very simple thing to make. And as you can see from the picture and description, it’s sole purpose is the help a person sew in a straight line. This puts me solidly in the second reason listed above on why I make something.

One night after work I stopped by my local hardware store and picked up two magnets. I got them for about $7 bucks. Here they are on Amazon: Master Magnetics #07216 1.425″d Round Base Magnet so you can get an idea what I’m talking about.

After a quick dig through the scrap wood pile in my shop I find the piece I need. (Look familiar Jason?):

Do a little measuring, cutting and trimming:

Slap it on the drill press:

Screw the magnets in place:

Tadaaaaa! The finished product:

I did a little bit of sanding on it as well. Usually, my “DIY/save money” projects end up taking me MUCH longer than expected and only end up saving a few bucks. But this one turned out pretty good. Total shop time was maybe 30-40 minutes, and cost was not quite $7 dollars.

Gratuitous almost action shot:

Posted in Installations | 3 Comments

Clean hole.

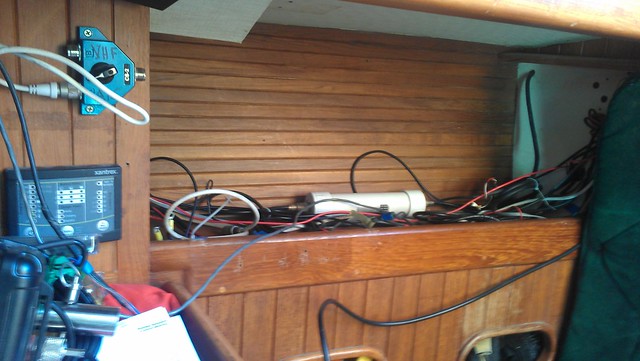
The following picture is a “cleaned up” version of what the little cubby hole next to the Nav station used to look like.

I say “cleaned up” because I realize the pile of wiring does not really look all that clean. But 15 minutes before that picture was taken that space was stuffed with a huge selection of useful, not so useful and just plain odd stuff. There was an old Radar display, an SSB radio, two old VHF radios, a ridiculous number of hats; a bull horn (not a bullhorn), but an actual bull’s horn; a pair of Gortex socks, a spot light, a plastic tube thingy; it looks like it should be used for something important but I don’t know what…..the list goes on and on….and seriously on.

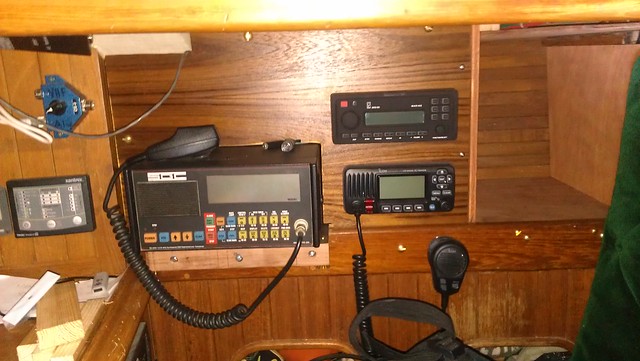
So after 6+ years of living on the boat and stuffing things in that little cubby hole, I decided to properly mount the SSB, our new stereo and VHF radio. Also left room for additional instruments, and a spot for some books and other things.

Here be the “almost” finished product.

I say “almost”, because I have a little fine tuning/finish work I wanna do. But as far as I’m concerned, this one is crossed off “THE LIST”.

Oh and most of the crap pulled out of there has moved to the port side of the boat in the little shelf in the aft cabin; along with all my tool bags. My apologies for any nightmares this may cause anyone that crashes in the aft cabin.

Posted in Installations, Palarran | 3 Comments

Don’t you just hate when your friends are right.

A couple years ago, a friend of mine (Aaron on Bella Star) was giving me some bullshit sob story of how hard(expensive) it was for him to find a replacement fresh water coolant pump for his Yanmar engine.

As he was telling me his story, I remember thinking, “What is this dickhead going on about”? I just went down to Hatton and got a brand new mixing elbow for my Yanmar (3QM30Y) engine. And had no problems getting parts at all. I was also thinking about a sandwich I had eaten the day before…..so delicious, so god damn delicious! So I may or may not have heard how he ended up getting his replaced.

Fast forward to this Labor day weekend. I had just started the engine on my boat, and was untying the dock lines to take off for the weekend. Just as I was about to put it reverse, the engine starts running a little rough and vibrating oddly. I retied the lines and checked the engine compartment.

Smoke!

SHIT!

I shut everything down and started troubleshooting. I noticed the fresh water pump was not spinning and was burning up the alternator belt. My first thought was that this would be an easy fix. Just pull off the old pump, go buy a new pump and bolt it back on. Easy Cheesy, right??

Nope, turns out Aaron was right. Yanmar has discontinued making water pumps for that engine. You can still get the parts to rebuild them, but not the pump housing. And hey, guess what! My pump housing was fucked up!! So I get the old, “you can always check craigslist or ebay”

If Yanmar still made this pump, the price for a replacement is around $800! I dug around the internet but could not find anything for sale that I could use.

What I did dig up is a website: www.rebuilt-water-pumps.com

It’s a small company down in Oregon. All they do is rebuild water pumps. So I call them up on a Thursday and describe my problem. The guy on the phone says: “Send me your pump, I’ll have it fixed and back to you by next Friday”. I was happy as shit, but was afraid to ask the price for that kind of service. He said it would probably be around $95 dollars. Maybe as high as $125 if the housing was really messed up.

True to his word, he calls me the following Wednesday and says the pump is ready and already in the mail back to me. Please send him a check for $135. The extra ten dollars is to cover the cost of shipping.

Oh and he includes a 3 year warranty on his rebuilds! WHAT!?

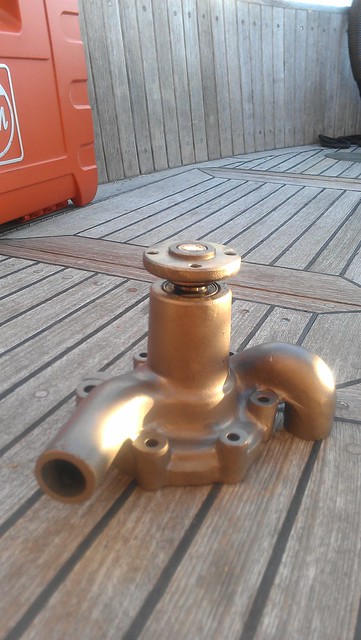
I got pump back, and it looks as good as new. He even included a gasket and two tootsie pops. I ate those, before I took the picture, sorry. They were watermelon flavor.

Posted in Installations | 4 Comments